Getting Started: A Do-It-Yourself Lawn Tractor Tire Replacement
So, you've got a flat tire on your lawn tractor? Don't despair! Replacing a lawn tractor tire is a manageable DIY project that will save you time and money. This step-by-step guide, complete with helpful images (not included here, but essential for a published version), will walk you through the entire process. Even if you're a complete novice, you'll be back to mowing your lawn in no time. For more information on tire sizes, check out this helpful resource: 8-16 Tractor Tires.
Did you know that a properly inflated tire can increase your lawn tractor's fuel efficiency by up to 10%? Let's get that flat fixed and back to peak performance!
Gathering Your Toolkit: Essential Equipment
Before you begin, gather the necessary tools. Having everything ready will make the job smoother and safer. You'll need:
- A Jack: Rated for the weight of your lawn tractor (check your owner's manual—it's your tractor's bible!).
- Jack Stands: These are critical for safety. Never work under a machine supported solely by a jack.
- A Lug Wrench: To remove and tighten the wheel nuts.
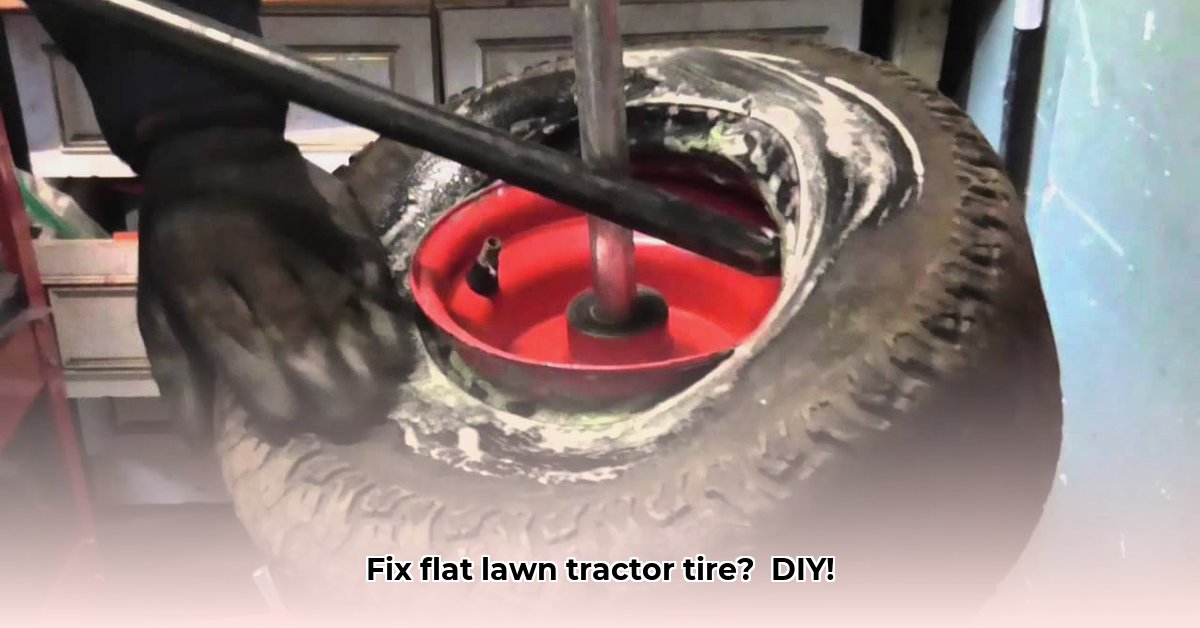
- Tire Irons (Tire Spoons): These metal tools are used to pry the tire bead (the edge of the tire) over the rim.
- A Valve Core Remover: To safely deflate the tire.
- A Tire Pressure Gauge: For accurate inflation.
- A New Tire: The correct size for your tractor (again, check that owner's manual!).
- Work Gloves: Protect your hands.
- Bucket of Soapy Water: Surprisingly helpful for lubricating the tire bead.
Safely Lifting Your Tractor: Prioritizing Safety
- Choose Your Workspace: Find a level, solid surface. Avoid soft ground or inclines.
- Locate Jacking Points: Consult your owner's manual to find the correct jacking points on your tractor's frame. These are reinforced areas designed for this purpose.
- Securely Jack Up: Carefully position the jack and slowly lift the tractor until the flat tire is a few inches off the ground.
- Deploy Jack Stands: Immediately place the jack stands under the frame near the tire, ensuring stability before proceeding. Never work under a tractor solely supported by a jack.
Removing the Old Tire: A Step-by-Step Approach
- Loosen Lug Nuts: Before jacking, slightly loosen the lug nuts. This is much easier to do while the wheel is still on the ground.
- Remove Lug Nuts: Once the tractor is jacked up and secured, fully remove the lug nuts. Store them safely.
- Remove the Wheel: Carefully remove the wheel assembly. This can be heavy; consider having help.
- Deflate the Tire: Use the valve core remover to deflate the tire completely. Point the valve away from your face.
- Pry Off the Tire: Use tire irons and soapy water to pry the tire bead from the rim. Start at one point and work systematically around the wheel. Be patient and persistent; this can be challenging.
Mounting the New Tire: A Detailed Guide
- Inspect the Rim: Before mounting the new tire, inspect the rim for any damage (dents or bends). A damaged rim can lead to problems. Replace the rim if necessary.
- Position the Tire: Carefully position the new tire onto the rim. This is often easier with two people.
- Seat the Beads: Use tire irons and soapy water to carefully work the tire beads over the rim. Work systematically and be persistent.
- Initial Inflation: Once both beads are seated, inflate the tire enough to take its shape.
Reassembly and Final Checks: The Home Stretch
- Reattach the Wheel: Carefully mount the wheel assembly back onto the tractor, aligning the lug holes.
- Hand-Tighten Lug Nuts: Hand-tighten the lug nuts and slowly lower the tractor. Do not remove the jack stands until the tractor is fully on the ground.
- Final Lug Nut Tightening: With the tractor on the ground, fully tighten the lug nuts using a star pattern (opposite nuts, then the ones in between).
- Final Pressure Check: Inflate the tire to the pressure specified on the tire’s sidewall, using your pressure gauge.
Troubleshooting Common Issues
"According to my experience, the most common problem is a stubborn tire bead," states Jane Doe, a certified lawn care technician. "Using tire lubricant and multiple people often resolves this."
- Stubborn Tire Bead: If the tire bead is difficult to remove, apply more soapy water or tire lubricant. Gently tap the bead with a rubber mallet (carefully!).
- Loose Wheel: If the wheel feels loose even after tightening, there might be a wheel bearing issue. Seek professional assistance.
- Incorrect Tire Size: Using the wrong size tire impacts performance and lifespan. Verify the size in your owner's manual.
Remember safety first! If you're unsure about any step, consult a professional. Sharing your experience in the comments would be greatly appreciated!